M5Stack ESP32 Dev Board
Introduction
Despite their popularity, I'd never programmed an ESP32 until recently. So last month, when I needed a processor and dev board for a couple of projects I'm working on, I wanted to branch out from my usual suspects -- AVR and STM32 -- and try something new. One of my projects involves logging, so wifi is big bonus because I can log to a server and get time easily with NTP.
After some searching around for ESP32 options, I found the M5Stack, and it looked like a nicely packaged little dev board. It has a battery for portability (on some models, see below), a few buttons, a TFT screen, a built-in MPU9250 9-axis IMU, and a nice case.
I recently got mine in, and have had time to get the tools working and play with it a bit. Getting the xtensa gcc toolschain running on OS X was straightforward. Getting the WIFI and display up and running was just a bit more work. All in all, I like it.
Room for improvement
There are some shortcomings on the M5Stack that I would love to see addressed in some future version.
No JTAG
I was dissapointed to find that one of the JTAG pins on the ESP32 is wired to the display. I think I could remove a resistor, and re-wire it to get JTAG instead of the display, but it would be nice to have both, and preferably without modifying the board. I think this could be achieved by moving the display chip select line. This is probably the biggest downside to me. I really want some JTAG debugging.
Documentation
Documentation is a little more sparse and spread out than I'd like. For example, they have several different variations that they sell, and it seems they are different board designs, but there is only one schematic. So the schematic is close to what my board is, but not quite, and I have no way to tell for sure what differs. There's no reference designators on the board, and no documentation providing these, so its really hard to work out what component is where on the PCB. It was also hard to get a clear picture of what the different base board options are in the different models. All-in-all, things could be presented better to make getting started easier.
Little IO on M5GO models
The most important difference between the models -- that I missed when I was ordering -- is that the options with the battery (this is the "M5Go" base board) do NOT have the rows of IO headers on the case. In fact, they only have 6 IO pins coming out, and two of those are shared with I2C devices inside so really can't be used for anything but a compatible I2C slave. So...make that 4 IOs. Oh, and one is an ADC pin and can only be used as an input I believe. So basically, on the versions with a battery (like the "Fire"), there is very little flexibility for external IO. This is pretty limiting for some things. I'm probably going to end up buying another one, this time with the IO base board instead of the battery. The Fire comes with a charging station, with magnetic quick-mount. I can imagine for some projects this would be pretty useful. But if you don't need the battery, go for the base board with more IO.
Summary: It's still a pretty cool product
Despite the nitpicks, overall I like the board a lot and I can see it finding a place in a lot of projects. It is a nice set of features wrapped into a clean little box.
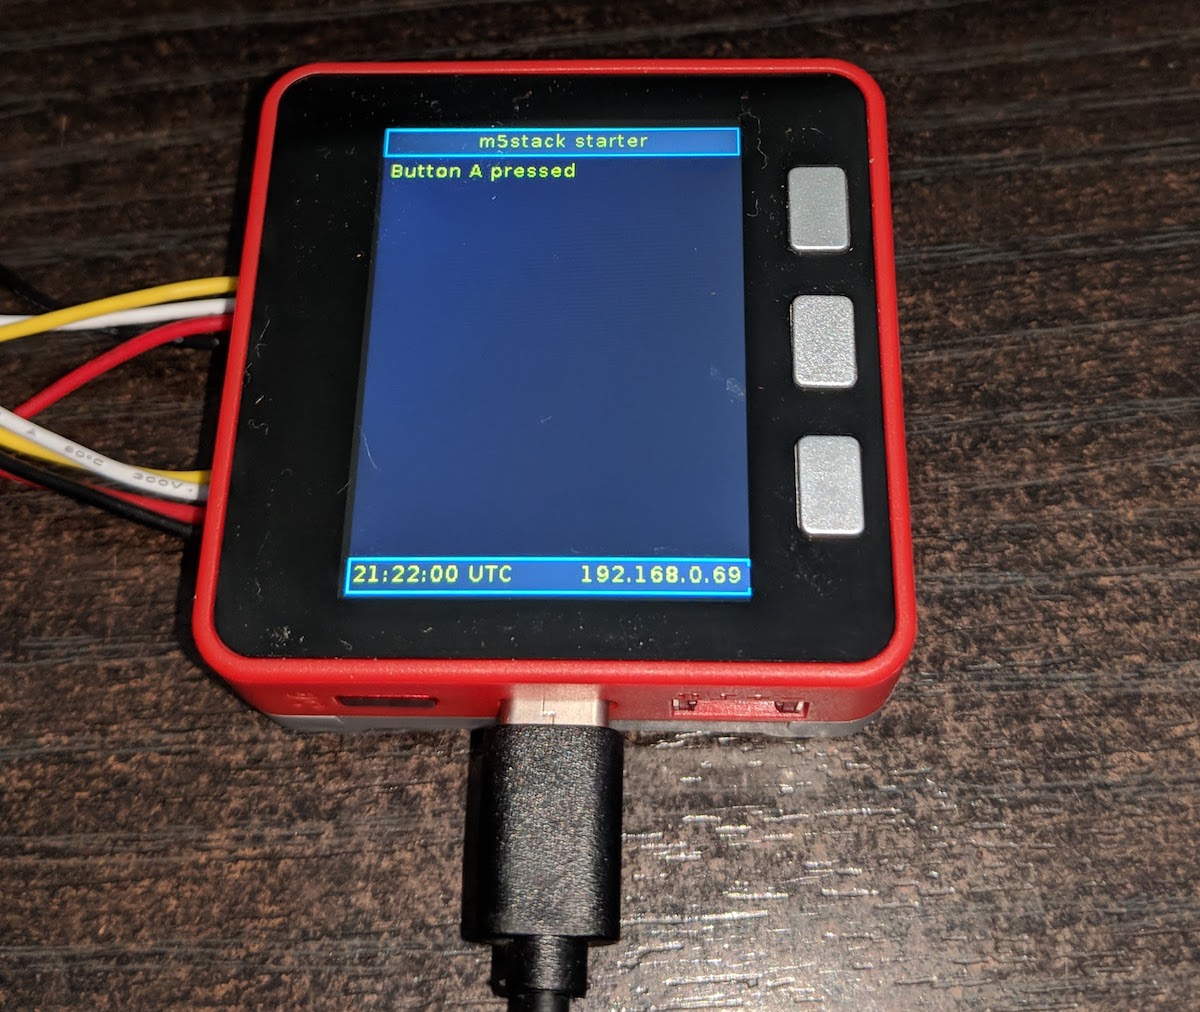
Starter Project
https://github.com/mcbridejc/m5stack-starter
There are a few features that I expect to want in any program for the M5Stack, so I put together a little starter project to collect these. Right now, it includes connecting to a network, getting time, and responding to mDNS requests, as well as a display driver to show basic status (IP address and time).